Thinning on top? Can’t be bothered with hair anymore? Or channeling your inner Vin Diesel? Whatever the reason, shaving your own head can be a rather nerve-wracking experience. Fear not; it’s a pretty simple process once you know what you’re doing. Here’s how to shave your head without any drama:
Step 1: Prepare the scalp
To keep the experience as stress-free as possible, it’s essential that your scalp is nicely prepped before you shave your head.
The most important thing is to get rid of any long bits of hair, so if you’re a newbie baldy, give your head a quick once over with some clippers/beard trimmer before you do anything else.
Don’t worry about what it looks like; it’ll all be gone soon anyway – just be sure to get it as short as you can.
Jump in the shower (it needs to be hot) and give your head a good scrub. As is also the case when shaving your face, your head should be clean and free of any dead skin. Starting off with a smoother surface means you’re less likely to suffer from ingrown hairs or razor burn.
You probably don’t have much hair at this point so no need to use shampoo – a bit of shower gel or face wash will do the job fine. The steam from the shower will help to soften the remaining hair, making for a smoother shave.
Apply a generous amount of shave gel all over your scalp, and let it sit for a few minutes before you go in with the razor. This might sound pretty trivial, but it really does make life a lot easier when it comes to shaving your head.
Tip: For an extra smooth shave, try applying a couple of drops of leif beard oil to your scalp before your shave gel. The formulation of natural essential oils will create an extra protective barrier for your skin, and allow for a smoother glide.
Step 2: Shave your head
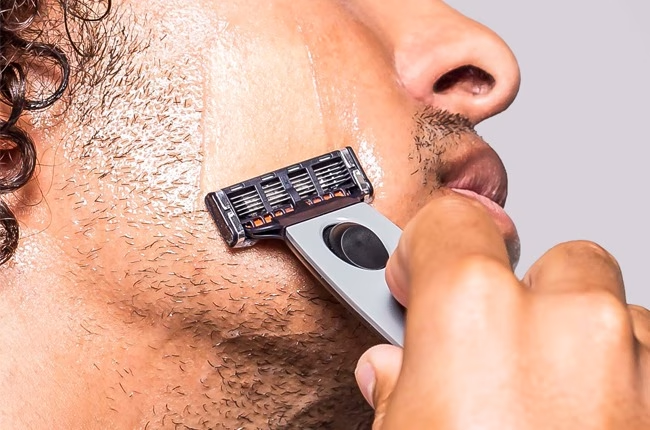
Shaving your head can feel quite odd when you’re not used to the angles and movements, so please do take your time.
Using a mirror (although you should be able to go mirror-free after a few shaves) begin by shaving the visible parts of your head, gliding the razor from front to back.
We’d usually recommend shaving with the grain, but in the case of shaving your head, you may find you need to go sideways, or against the grain to ensure you get all the hair. Start with the grain, and see how you go from there.
Try and avoid pressing down too hard, as this can lead to irritation. Providing you’re using a fresh sharp blade (which we hope you are) this shouldn’t be too much of an issue.
As well as being the trickiest part, the hairs on the back of your head are the most course, so leaving them until the end means your shave gel has time to sink in and work its magic.
Put your head down so that the skin is taut. Starting at the nape of your neck, shave with the same light strokes as you did in the front. You can use a mirror if you want, but to be honest, we think it’s best to do the back without, as trying to coordinate the mirror image of yourself is often more confusing than it is helpful.
Step 3: Rinse your head
Once you’ve finished shaving your head, give it a good rinse with water, getting rid of any hair and product that’s still hanging around. Keep the temperature cool this time, as this will close your pores and leave the skin feeling nice and firm.
Once you’ve rinsed, gently pat your head dry with a towel.
Give your head a quick once over with your hands to feel for any rogue hair that’s been left behind. If you want to be extra safe, get someone (ideally who wouldn’t let you walk around looking like a wally) to have a quick check for you.
Step 4: Give your head some TLC
The final step is to soothe and protect your freshly shaved noggin. Seal the deal with your usual post-shave moisturiser – kåre works a treat as its lightweight formula won’t leave you feeling greasy, or shining like a disco-ball.
Tip: After a super-matte finish? Give your scalp a quick once over with some gösta tonic before you apply your moisturiser.
Congratulations, you’re now a fully fledged baldy! Maintain your new streamlined look with regular moisturising, and remember to use SPF if you’re out in the sun – cherry tomato isn’t a good look!